

How To Add Brushes To Corel Paintshop Pro 7
Brushes are extremely powerful tools in PaintShop Pro and if you lot go online, there are a lot of resources that you lot can employ to add brushes to your program, however, different sources volition offer them in numerous formats and each of them requires you to get them inside PSP differently, which can get disruptive. Let'due south streamline all those options.
Importing PSP brushes with two files
Although there are non that many resource offering PSP brushes, y'all can still find some, including the Discovery Center, and the Cosmos Cassel store. A brush in PaintShop Pro requires two files: i will have the .PspBrush extension and one will have a .PspScript extension.
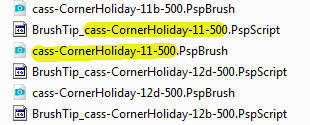
If the supplies y'all downloaded includes both of those files, you lot simply have to copy and paste them into your Brushes folder and that is all you lot have to do.
If you are curious every bit to why there are ii files, here is the caption. The .PspBrush file is the bodily shape of the brush tip. The .PspScript file (which you can open in Notepad) volition include information almost the various settings for that castor tip.
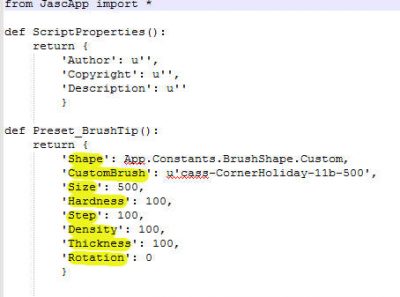
If the Castor Variances settings were also saved, you would see them in that listing too.
Importing PSP brushes with just one file
Occasionally, you might get some brushes but it is missing the .PspScript file and you merely take the .PspBrush file. You might think that this is the necessary file but if y'all were to copy and paste it in your Brushes binder, once you would activate the Brush tool, the only thing you would come across is a circular hulk in the drop-downward list of brushes. That is useless to yous. If yous accept such brushes, y'all need to IMPORT them into PaintShop Pro, fifty-fifty if they are already .PspBrush format. The import process will create the .PspScript file that is needed.
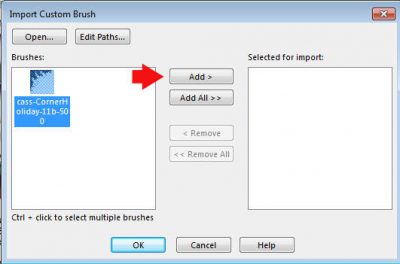
Go to File > Import > Custom Brush and you will become this dialogue window:
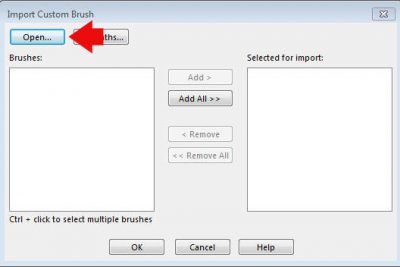
Once you click on Open, you tin can navigate to the .PspBrush file that y'all need to import. Information technology will then appear in the left pane.
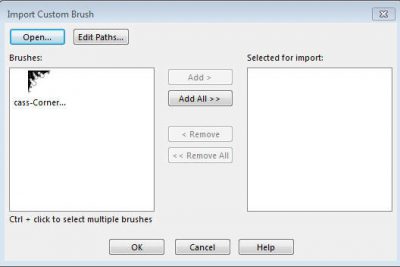
Select information technology, and click Add > to brand it appear on the right pane.
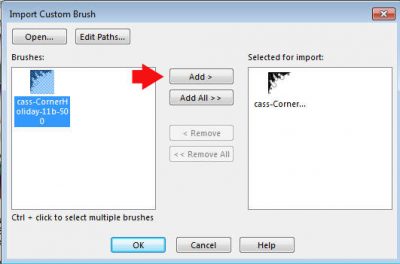
Click OK and information technology will create the missing file and the brush will then exist available in your drop-downward list of brushes.
Importing .abr brushes
Since version X5, PaintShop Pro tin can import .abr brushes (which are Adobe Photoshop brushes) in the exact same mode you imported PSP brushes with ane missing file. When you open a .abr file, you will ofttimes come across more than one actual brush tip, but just as mentioned above, you tin can select a few brushes or select them all. During that procedure, both files will exist created for PaintShop Pro to read and use.
If you are using PSPX4 and before, you lot will need to convert the .abr brushes into .png files. This can be done with abrMate. Download it Hither. Yous tin can follow the instructions on this page to convert them into .png files, and and then, follow the instructions simply beneath to convert the .png files into brushes for PaintShop Pro.
Using PNG brushes
Other resources will offering y'all brushes in .png format. You cannot utilise those files as brushes, as is, and yous cannot import them in the same mode, just you lot can nonetheless turn them into custom brushes, using a different approach.
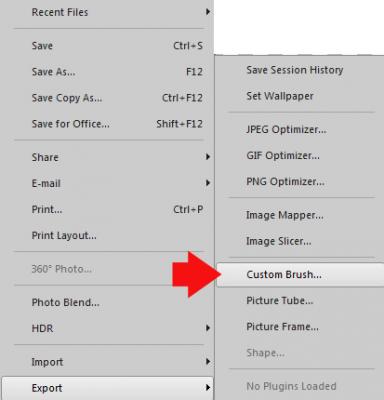
The long way would be to open the file in your PaintShop Pro and go File > Export > Custom Castor.
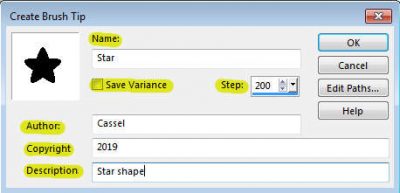
And that volition bring up this dialog window where y'all can enter various data. Notice that those data are what y'all saw in the .PspScript file. Whatever you enter will exist saved in that file. If you check the Save Variance box, all the settings in the Brush Variance Palette will also be saved.
I mentioned that this is the long mode. A shorter way is to use a gratis script that volition batch convert all the .png files you lot have in a single folder, into custom brushes that you lot tin apply in PaintShop Pro. You can download Suz' script HERE. Unzip and save the .PspScript file into the Trusted Scripts folder of your PaintShop Pro (or where you keep your diverse supplies).
Open the file in Notepad as y'all take to edit it. You will see this on the summit of the text:
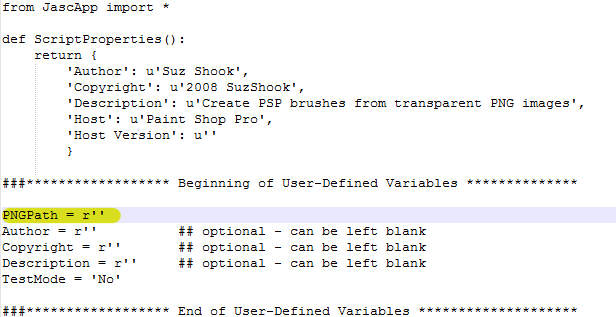
The main part you need to edit is the path where all the .png files are located (make sure they are all in a single binder). The other information are optional. Here is an edited version:
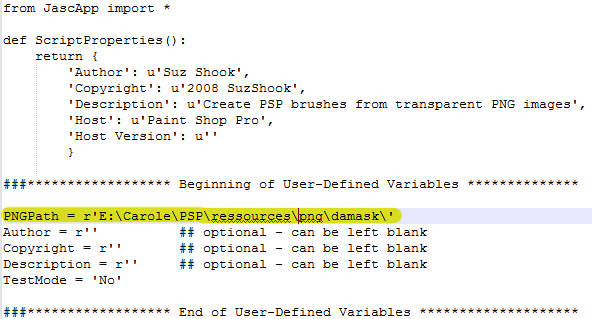
In this example, information technology shows that the .png files are in the \damask\ folder. You tin have your files anywhere, as long as the path is conspicuously identified. Beware that accented characters are not read well by scripts so if you accept a folder that includes such characters in its name, yous might need to rename information technology to utilise only non-accented characters. If not, the script will just practice zip.
Once you take edited the file, save it, and in your PaintShop Pro, only run the script and it will practise all the work for you, silently. You will and so have all those .png images turned into brushes that you volition be able to employ.
As you can encounter, you are now able to browse the internet, and the various resource sites and gather whatsoever brushes that interests you lot, and utilise them in your PaintShop Pro even if they were not, initially meant to be used for that programme. Isn't PaintShop Pro a powerful and versatile plan?
 Now that you take admission to even more brushes, check out our Brush Work in PSP Master Grade to find more uses for them in your next scrapbooking projects.

How To Add Brushes To Corel Paintshop Pro 7,
Source: https://scrapbookcampus.com/2019/03/adding-brushes-to-paintshop-pro/
Posted by: brinsonthund1953.blogspot.com
0 Response to "How To Add Brushes To Corel Paintshop Pro 7"
Post a Comment